There are 3 steps in the process of editing a page and making those edits live to the general public.
Save
Check In
Publish
When you start editing a page, the page will automatically be checked out to you. This is to ensure that more than one person can't make edits at the same time; you won't have to worry about your changes conflicting with someone else's changes.
You will see a message in the top right area of the Ribbon saying that you have the page checked out.

If another editor navigates to this page, they too will see the message that you have the page checked out. They will also be unable to make any edits to the page.
Save

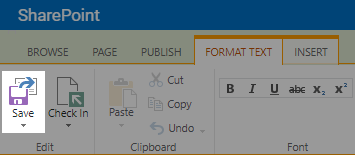
As you are making edits to your pages you will want to save your work.
To save your page, click the
Page tab in the Ribbon and click the
Save button.
Your page will be saved and you will be taken out of edit mode. The page will still be checked out to you.
Saving will simply save a draft of your edits. The general public will not see the edits you have saved, nor will the other site editors. While the page is checked out to you, and you are making edits, you are the only one that can see your work.
You should remember to save your work before stepping away from your desk for an extended period. If you forget and attempt to save when you return, your save may not process correctly and you could lose work.
If you'd like to share what you were working on with another site editor or have a question about a page, you will need to check in the page prior to sharing it so the other editor will be able to see your work.
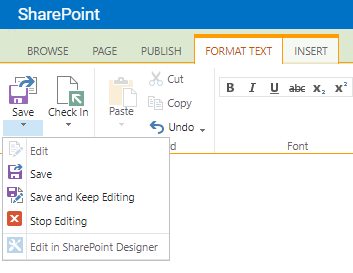
You can click the arrow under the Save button for some additional options.

-
Edit: Start Editing the page. Only available if you are not already editing.
-
Save: Saves the page, just like the larger Save button above.
-
Save and Keep Editing: Save the page, but don't leave edit mode. Like an autosave without the automatic part.
-
Stop Editing: Stop making edits and leave edit mode. You will be asked if you want to save your work.
Check In

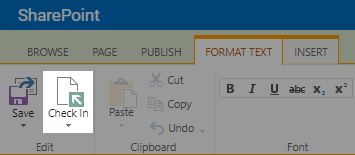
When you are done making edits to your page you will want to check in the page.
To check in the page, click the
Page tab in the Ribbon and click the
Check In button.
Checking in the page will not allow the general public to see your edits yet; it simply means that you are finished editing.
By checking in the page the other editors on the site will be able to see or review any edits you have made to the page.
You can click the arrow under the Check In button for some additional options.

-
Check Out: Check Out the page to you. Only available if no one has the page checked out.
-
Check In: Check In the page, just like the larger Check In button above.
-
Discard Check Out: This will “undo” your last check out. If you were working on some edits that you no longer need, you can use this option to reverse your check out and revert the page to its previous state.
Note: this will only revert your last check out; if you had checked out / checked in the page multiple times it will only discard the last time.
-
Override Check Out: Available if the page is checked out to another editor. You may use this if you need to take control of a page to make edits urgently.
Note: selecting this option will cause the person that had the page checked out to lose their work!
Publish

When you are ready for your edits to be seen by the general public you can publish your page. To publish the page, click the
Publish tab in the Ribbon and click the
Publish button.
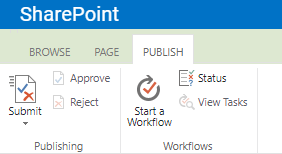
Note: you may see a
Submit button instead of a Publish button. This means that the site has an approval process before the page can be published. Review the Approval Process section below for details.
After the page is published, the general public will see your edits. You should navigate to the non-edit page (the live site) and double-check that your edits are appearing as you desired.
Approval Process

If you see a Submit button instead of a Publish button, the page will need to go through an approval process before the edits can be made live.
- On the page where you want to push edits live, click the
Submit button.
- A form will appear.
- You can type a message in the Request field. This message will be sent to the approvers for your site.
- Click the
Start button.
- Your site's approvers will receive an email that you are requesting to publish a page. The approver will review the page and can either Approve it or Reject it. If the page is approved your edits will go live. If it is rejected the edits will not go live and you can check out the page again to make edits before submitting it for approval.
Unpublishing a Page

If a page is already published, you will see an
Unpublish button instead of Publish. Unpublishing a page means making the page unavailable to the general public.
When you unpublish a page, the page still exists, but only for those who have access to edit the site; you will still be able to see and edit the page.
If a site visitor attempts to view the unpublished page, they will see a prompt to login to the page. They will be unable to login, and clicking the Cancel button will show a 401 Unauthorized message.
If you ever encounter a page on your live site that shows a login prompt,
do not log in to the live site.
You should navigate to your edit site to make changes or publish the page.