A list is a catalog of data resembling an Excel spreadsheet, made up of rows and columns that hold that data.

Lists help make it easier to manage and update content on your site when that content has a consistent structure, like contact information, alerts, or a listing of items. Updates are made in the list, and the list information is then formatted and added to your site via Content Query web part or custom code.
Often, lists are created by Tyler Technologies and the queries to add the content to the page are already set up for you. You likely will not find yourself needing to create a list and set up a query, but it is important to know how to update and work with lists.
Note: When you make updates to the list, those updates do not have a check in / publish process like the pages do. Any updates you make to the list will start showing up on your site immediately.
Accessing the List
Generally, lists are created in the area of the site that they are displayed in. From the page that the list is being displayed on, click on the
Site Actions gear in the top right and
choose 'Site contents'. On this page, look for an item that has a name related to the content that the list has; if the list stores contact information, look for an item relating to contact info.
If you do not see your list here, try going to your site's home page, go to the Site contents again, and look for the list there. Sometimes lists are stored at the top level if the information they hold is used across the whole site.
Adding New Items
You can add new items to the list by clicking the
new item button located at the top of the list items.
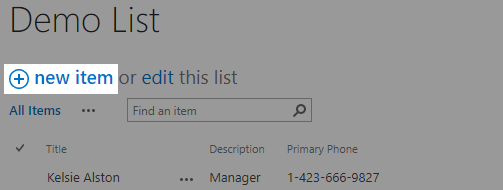
This will open a form where you can fill out all of the fields in the list. When you are done, click the
Save button. You will see your new item added to the list. If the list information is displayed on a page, you will see your new item appear shortly.
Updating Items
There are 3 methods that you can use to update a list item. The options available will depend on the view set for the list.
Follow whichever method matches your view on your list.
- Option 1: If there are 3 dots next to the title of this list item,
click the 3 dots and choose the
Edit Item option.
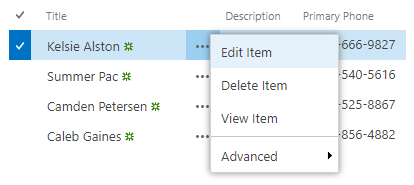
- Option 2: Hover over the list item and
click the check mark on the left to select the list item. With the item selected, go to the
ITEMS tab in the Ribbon and click the
Edit Item button.
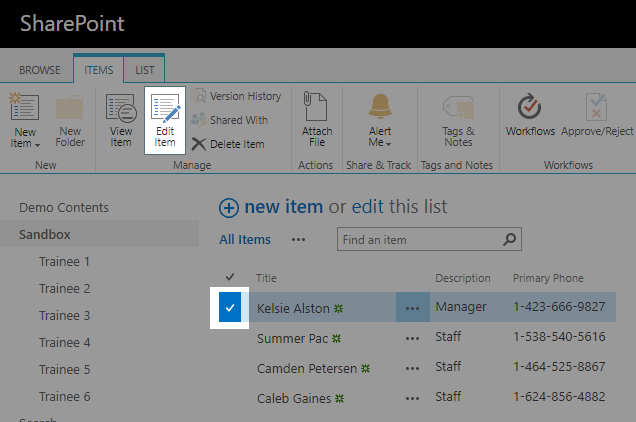
- Option 3: Click the icon that resembles a paper with a pencil over it.

In the form that appears, update any information that you need, then click the
Save button.
Updating Multiple Items
If you need to make updates to more than one list item, you can put the list into a Quick Edit mode. Quick Edit mode works like Excel where you can edit each list’s data in a grid view.
To enable Quick Edit mode, click the
edit link in the "new item or edit this list" text above the list items.
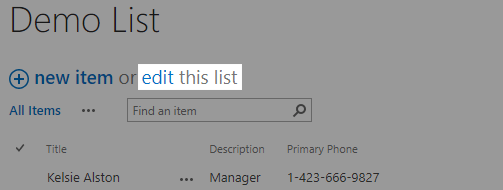
When Quick Edit mode is active you will see some faded grey lines creating a grid around the list items.
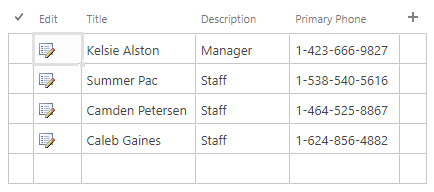
You can now click into any field and make the updates necessary. When you are done with your edits, click the
Stop link in the “Stop editing this list” text above the list items.

Deleting Items
If you no longer need a list item, there are two ways you can delete it, depending on the view set for the list.
Follow whichever method matches your view on your list.
Option 1: If there are 3 dots next to the title of this list item,
click the 3 dots and choose the
Delete Item option.
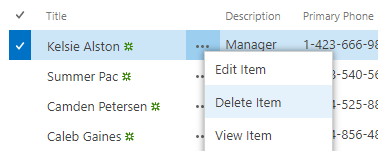
Option 2: Hover over the list item and
click the check mark on the left to select the list item. With the item selected, go to the
ITEMS tab in the Ribbon and click the
Delete Item button.
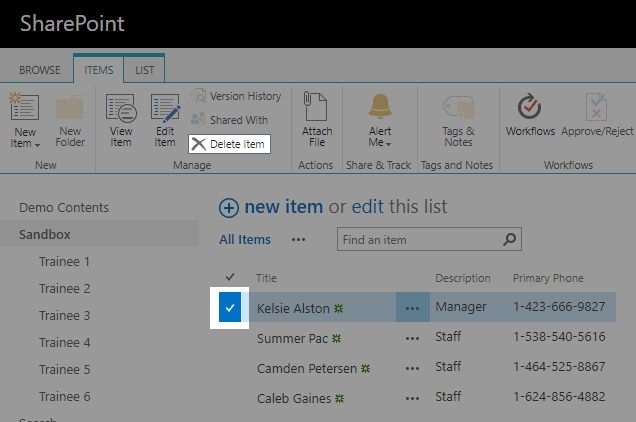
When you click Delete you will get a prompt asking you to confirm the deletion. Click OK.
The list item that you deleted will be sent to a recycle bin where it will remain for a few weeks before being deleted.
List Fields
The fields available in lists are generally set up for you by Tyler Technologies. If you want to add or remove a field from the list please reach out to
Tyler Technologies support and we can assist in making the updates.