Web parts are specialized widgets designed to help you easily add more complex types of content.
Web parts can help you add content to different areas of your page layouts that you can't click and type into. They can also make it easy to add a listing of links or pull in and format a large set of data or documents.
There are many web parts available to use, however we do recommend you stick to just the web parts listed in this Web Parts documentation.
Before we cover what each of the web parts can do, let's learn how to add or delete a web part.
Adding a Web Part
Web Parts are typically added to Web Part zones, though they can also be added to the content areas where you can click and type text. We recommend adding web parts to web part zones if possible; it makes it easier to rearrange or move them.
Add to Web Part Zones
- While editing a page, locate the web part zone you want to add the web part to.
Click the 'Add a Web Part' link inside the web part zone.

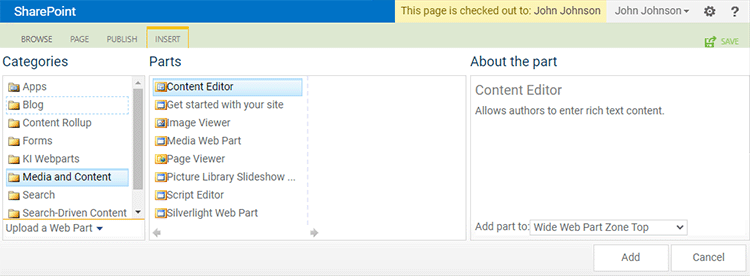
- A new panel will appear listing the available web parts, sorted by categories.
-
Click the category that the web part belongs to, then locate the name of the web part you want to use. To learn which category each web part can be found in, please consult the individual web part guide pages.
-
Click the name of the web part you are adding, then
click the Add button in the web parts panel.
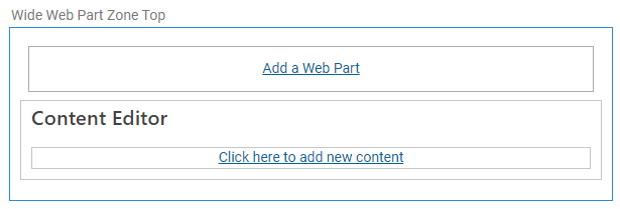
- The page will reload and your web part will be added to the page in the web part zone you selected.
Add to Editable Content Areas
It is best to add web parts to web part zones. Web part zones make it easy to re-order and move the web parts.
If you do need to add a web part to an editable content area instead, follow the steps below.
- While editing a page, click and place your cursor where you'd like to add the web part.
-
Click the INSERT tab in the ribbon and
choose the Web Part button.

- A new panel will appear listing the available web parts, sorted by categories.

Ensure your web part will be added to the correct place.
In the middle of the web part panel is a select box identifying where the web part will be added.
Make sure the
'Add part to' select box is marked as
'Rich Content' or something that is not the name of one of the web part zones.

-
Click the category that the web part belongs to, then locate the name of the web part you want to use.
-
Click the name of the web part you are adding, then
click the Add button in the web parts panel.
- The page will reload and your web part will be added to the page where you had placed your cursor when adding the web part.
Deleting a Web Part
-
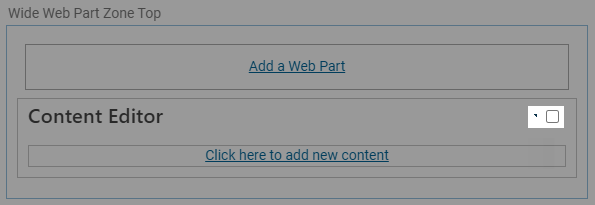
Hover over the title of the web part you want to delete. A small arrow and check box will appear in the top right of the web part.
-
Click the arrow and
choose Delete from the dropdown.
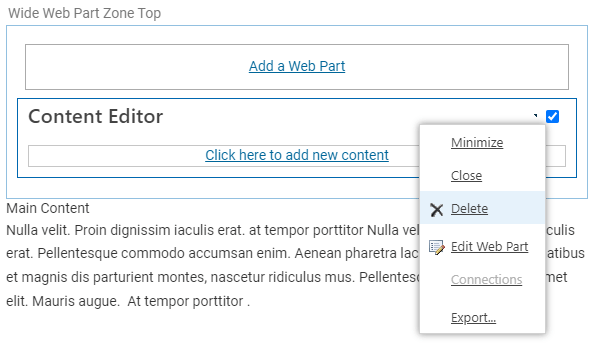
- You will get a prompt asking if you want to delete the web part. Click the OK button.
- The page will refresh and the web part will be removed.
Reorder Web Parts in a Web Part Zone
Web parts are typically added at the top of the web part zone. If you know which web parts you will need, you can add them in reverse order. If you didn't or can't add web parts this way you can always change the order after they are added to the page.
Note: You cannot control the order of web parts when they are added to editable content areas (those added to Rich Content sections). This is another reason we encourage web parts to be added to web part zones.
If you need to change the order of the web parts you can use the web part's index number to control order.
-
Hover over the title of the web part you want to update. A small arrow and check box will appear in the top right of the web part.

-
Click the arrow and
choose Edit Web Part from the drop down.
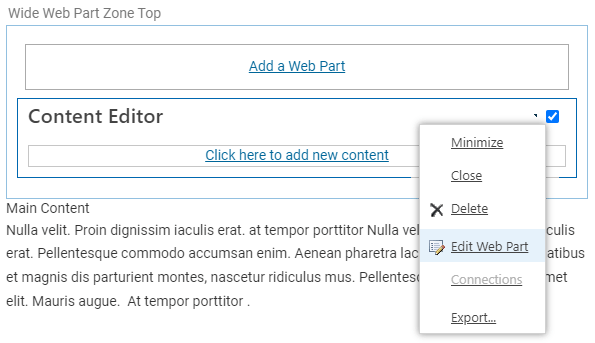
- A new panel will appear on the right of the page.
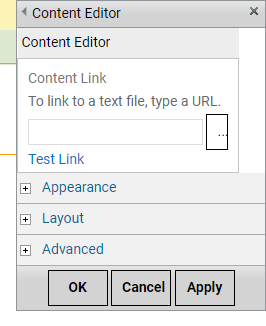
-
Click the Layout title to expand the layout options.
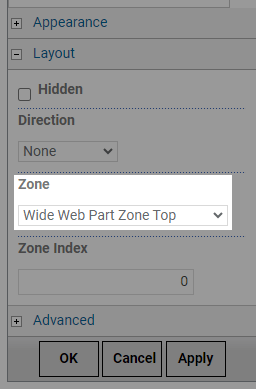
- To change the zone that the web part is in, you can select a new zone from the Zone select box.
- To change the order of the web parts,
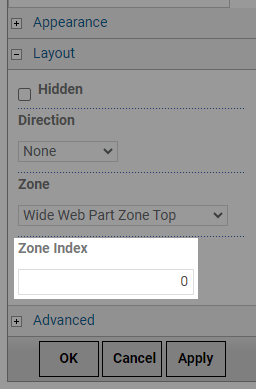
enter a number in the Zone Index box. The index starts at 0, so 1 would be listed second, 2 would be 3rd, etc.
-
Click the OK button in the web part properties panel.
- The page will refresh and your web part's position will be updated. You may have to repeat this with the other web parts if your order is still not what you wanted.